VoIPSuite Guide
UPDATE (August 25, 2022): Heroku has announced that they will no longer offer their free tier after November 28, 2022. Because of this, these new instructions now use Render.
If you have been following the steps in Extreme Privacy, you might possess VOIP telephone service through Twilio or Telnyx. In the book, I offer ways to push SMS text messages to email, but that does not allow you to send messages. The following steps create your own self-hosted SMS web app which allows you to send and receive SMS text messages through unlimited Telnyx and/or Twilio telephone numbers within any platform (Windows, Mac, Linux, iOS, Android, browser, etc.). The instructions at the end of this page allow optional calling features within the same application. You will need to obtain access to Twilio and/or Telnyx as explained within Extreme Privacy. Once your accounts are created, verified, and configured for VOICE as explained in the book (but not configured for SMS!), conduct the following. The process is lengthy, but only needs completed once. You will need to dedicate an uninterrupted hour for this tutorial.
First, you need to create a database which will hold all of the message content. You can use the free version of MongoDB for this. Think of this as the storage for your text messages to which only you have access.
Open a new tab and navigate to http://www.mongodb.com/
Click "Try Free"
Enter email, name, and password, and submit
Confirm verification email
Begin the onboarding process
Choose "Build a new Application"
Choose "Mobile"
Choose "Other"
Continue to next page
Choose "Shared" and click "Create"
Click "Create Cluster"
Click "Database" in the left menu
Click "Connect"
Click "Allow Access From Anywhere"
Click "Add IP Address"
Create user and password for the database (no special chars)
Click "Create Database User"
Click "Choose a Connection Method"
Click "Connect using MongoDB Compass
Click "I have MongoDB Compass"
Copy and save the "connection string"
Click "Close"
Click "Browse Collections"
Click "Add My Own Data"
Enter a unique "Database Name" such as "viopsuite"
Enter a unique "Collection Name" such as "voip"
Click "Create"
Click the leaf in the upper-left to return to your dashboard
Click on your project
Enable 2FA at https://account.mongodb.com/account/profile/security
Next, you need a host for your web app. For this, you can use a free version of Render. Think of this as the website which will execute the software for your daily use.
Navigate to https://render.com/
Click "Get Started"
Enter mandatory details and submit
Confirm verification email
Click "New Web Service"
Enter "https://github.com/0perationPrivacy/VoIP"
Click "Continue"
Provide a unique name such as "voipsuite"
Change "Environment" to "Node"
Change "Build Command" to "npm install"
Change "Start Command" to "node app.js"
Select the free plan
Click "Create Web Service"
Save the URL such as "https://voip-14.onrender.com/"
Click "Environment"
Click "Add Environment Value"
Enter "BASE_URL" in the "KEY" field
Enter the saved URL in the "VALUE" field
Click "Save Changes"
Click "Add Environment Value"
Enter "DB" in the "KEY" field
Paste your MongoDB "connection string" into "VALUE"
Replace "password" with the MongoDB password
Be sure to remove the brackets (< >)!
Click "Save Changes"
Click "Add Environment Value"
Enter "COOKIE_KEY" in the empty "KEY" field
Enter 20 random characters in the "VALUE" field
Click "Save Changes"
Enable 2FA in the account settings
Navigate to "Dashboard" then "Events"
Wait for deployment to finish
Click "Settings" and ensure "Auto-Deploy is "Yes"
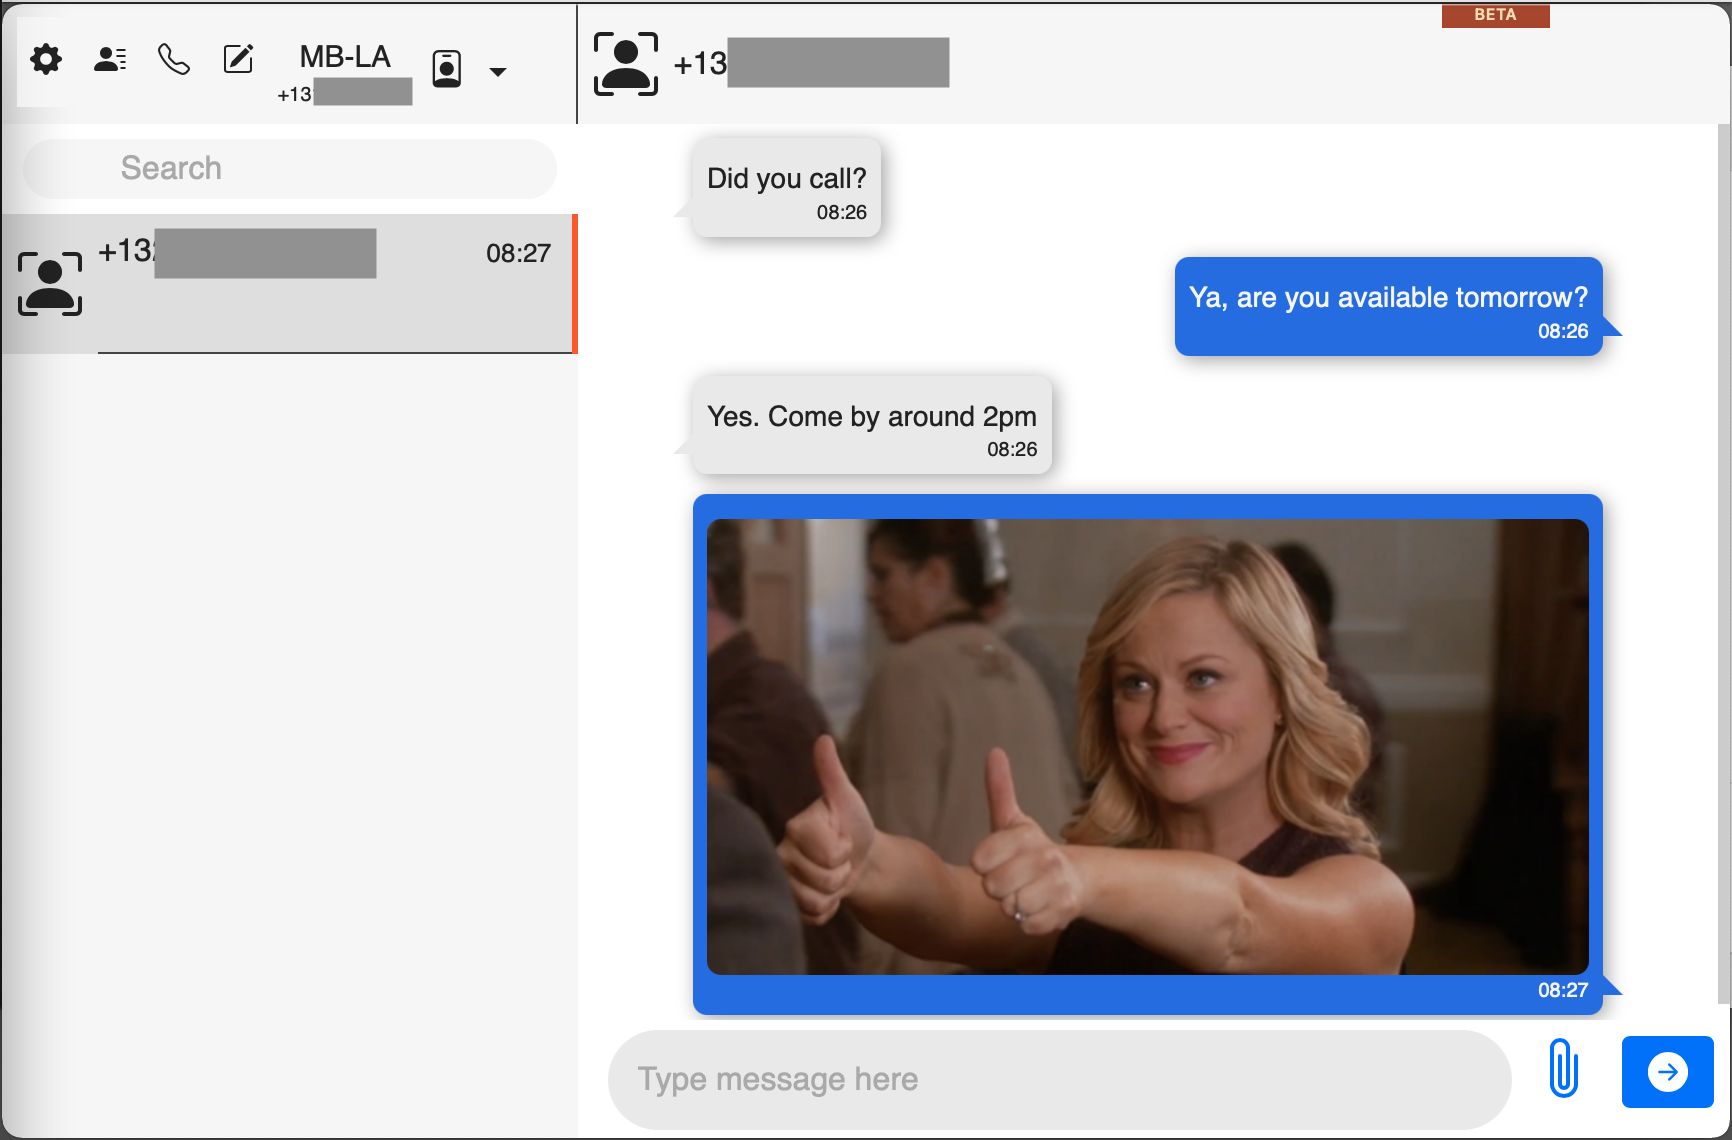
You can now launch your new web app within any browser by navigating to the URL mentioned above (https://voip-xxx.onrender.com). If necessary, refresh the browser until you see the login page. Next, you must configure each Telnyx or Twilio number you wish to use within this app.
Click "Sign Up" to create a new account
Enter a unique username
Enter a secure password
Click "Sign Up"
Log into your new account
Click the dropdown menu and select "Add New Profile"
Enter a "Profile" name such as "Twiliovoip"
CLick "Save"
Make sure this profile is selected and displayed
Click the Settings icon in the upper-left
Click "Profile Settings"
For Telnyx numbers:
Select the Telnyx option
Enter your Telnyx API key available within the Telnyx Dashboard
Click "Get Number"
Choose the desired number within the dropdown menu
Click "Save" then "OK"
For Twilio numbers:
Select the Twilio option
Enter your Twilio SID and Token available within the Twilio Dashboard
Click "Get Number"
Choose the desired number within the dropdown menu
Click "Save" then "OK"
Repeat the process of creating a new profile for each number you own. You can delete a profile by selecting the profile, clicking the settings icon, and clicking the trash can icon for that profile.
Calling (BETA): You can place calls within VoIPSuite by clicking the phone icon in the upper-left while in any profile. Incoming calls require the app to be open and ready to answer. This all requires your browser to have microphone permissions. We are aware of bugs with this, especially with Twilio. You may need to click "Save" again within each profile's "Profile Settings" for the calling feature to take effect within existing profiles. Updates coming soon.
Once you have your account created, you should consider disabling new accounts. This prevents someone from creating an account within your app and using your online resources. This is optional, but encouraged.
Return to your Render portal
Select your app
Click "Environment"
Click "Add Environment Variable"
In the "KEY" field enter "SIGNUPS"
In the "VALUE" field enter "off"
Click "Save Changes"
Navigate to "Dashboard" then "Events"
Wait for deployment to finish
Refresh your app URL
Ensure new registrations are disabled
Next, you need to make sure your new web app does not "sleep" after inactivity. You can use a free version of Uptime Robot to ping your new web app every 5 minutes with the following steps.
Navigate to https://uptimerobot.com/
Click "Register for Free"
Provide any name, email, and password
Confirm verification email
Optional: Navigate to https://uptimerobot.com/dashboard.php#mySettings
Optional: Select the 2FA checkbox and enable 2FA
Return to the dashboard
Click "Add New Monitor"
Change "Monitor Type" to "HTTP(S)"
Apply "Friendly Name" of "VOIP"
Provide URL of your Render App used previously
Change "Monitoring Interval" to "5 minutes"
Click "Create Monitor"
Click the "Create..." button again
You should now have a fully functional VoIP app ready for use.
Privacy Book
Our latest (4th Edition) book on Extreme Privacy is now available. Click HERE for details.